Tuesday, October 16, 2007

What's Your Vector, Victor? Part Deux

The wonders of modern GPS systems are a huge part of this project. We're using Google and Microsoft Mappoint for our tracking software. (No, we didn't spend huge $$$ to get Mappoint. I got it free with my work volunteering for the National Girls' Collaborative Project, a pretty worthy cause that you should check out.) Google rocks, but we needed some sort of software that we could access without a connection to the Internet for map updates (like Google Maps needs).

Daniel took it out and drove around in his car the other day to see how the software works, and he was able to draw out a track (not shown here). Tonight, while we were waiting for Alli and Dale to come back from the store, Daniel came out front with the laptop and I rode off on my bike. (Kids, don't try this at home! Especially not after dark, in dark clothes, without a headlight. I should have been wearing sunglasses, too.)

Unfortunately, the antenna on the receiver wasn't powerful enough. We switched out the antenna (more power!) and then Alli and I went for a walk around the neighborhood.

Success! Here's a copy of the track we walked after it was imported to Google Earth. (It was actually dark out when we went walking.) We didn't actually walk *through* those houses, but it's pretty good for a homemade tracker system.

Perish the Thought!


And now, for something totally different... the chemical engineer is posting (instead of the three network engineers).

A lot has happened since the last post. Now we're working some on the mechanical engineering parts of the project: putting together the payload and connecting it to the balloon. A week ago Sunday, we made a trip to Lowe's to buy some of the nuts and bolts (literally) of the project. (When we figure out exactly what pieces end up as a part of the final project, we'll list them here.) We met at Dale's to work on building the payload.

We got a medical-grade styrofoam cooler, which came in a box like this one that Erin is modeling for us.

Dale and Alli drilled some holes into the cooler to push through two threaded metal rods, which were cut from a single 3-foot span. Unfortunately, the threads got crushed from being held in a vise to be cut, so we ended up breaking the rods and stopped for the day.

Monday, October 1, 2007

Transmit and Receive now working

We met at Dale's house last week to assemble and program our RF transmitter (the Micro-Trak 300). We programed the transmitter with our callsign and told it how often to transmit the GPS coordinates coming from the GPS Receiver. Programming the transmitter was done through a windows application from byonics.


We had to do a little bit of soldering...lucky for us Erin was there to give us a hand :) I suppose at this point she is destined to be an engineer.


Here you can see how the power source, antenna, GPS receiver, and the RF transmitter all connect. We are able to receive the signal with our scanner, feed the audio output from the scanner into our laptop and have the laptop plot the location of the device on a map!


Friday, September 28, 2007

Doctor, doctor.....doctor, doctor

Welcome to Project-WARPED Michelle, Ryan, Mark, Aaron, and James!! We now have enough members with a PhD that all WARPED meetings will begin as shown above :)

Another cool balloon project

I stumbled across the blog for GeoCam the other day. These guys are working on a project to photograph a large geographic area following a natural disaster (think New Orleans the day after Hurricane Katrina). The logic is that it can take several days to reposition a satellite to photograph the disaster zone so why not use a high altitude balloon with a digital camera to do the job ASAP.

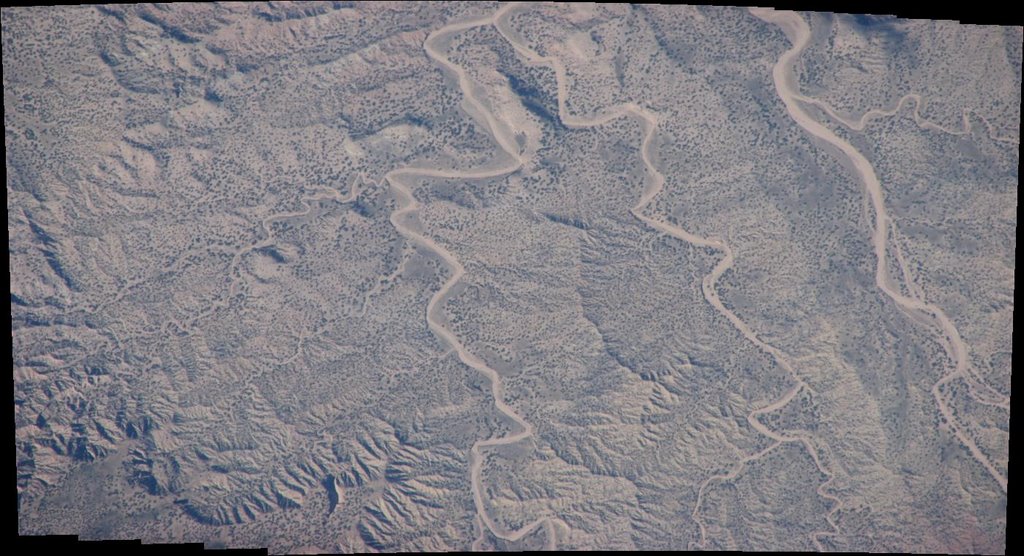
They have developed a mechanical device to twist and tilt the camera so they can photograph a wider area than if they only snapped photos with the camera pointed straight down. The pictures are then stitched together to form one larger picture like so:


It seems like a good idea. Hopefully they are able to get the kinks worked out before the next big hurricane hits.

Monday, September 24, 2007

Overall gameplan

One of our motivations for blogging this project is that we haven't been able to find any good "from start to finish" documentation on how to launch a camera with a weather balloon and recover it. We found several other balloon blogs but none of them gave much detail on how they did everything. We're going to try to document as much as we can so that hopefully someone can use this blog as a reference for their own balloon project. That said, here is a rough overview of how we think this will work. We're learning as we go though so I'm sure this will change.

  • Ascent - This is the easy part (we think). We buy a weather balloon, put our camera and other electronics gear in some sort of styrofoam box, attach the box to a parachute and attach the parachute to the weather balloon. Then we fill our balloon with enough Helium to lift the payload (camera, styrofoam box, parachute, etc) plus 1 lb to 1.5 lbs of extra lift. Dale found a chart that shows what the ascent rate should be based on how much extra lift you have. I'll get that from him and will link it here. I found one balloon site where the group was using Hydrogen to provide lift. Didn't the Germans give that a try a few years ago? :) I like having eyebrows so I think we'll stick to Helium.
  • Descent - At some point the weather balloon will burst due to the expansion of the Helium. Of the other balloon project websites that we've read the highest launch was to 117k feet. That's pretty darn high if you stop and think about it! I know I'll be very happy if we get anywhere close to that. Anyway, once the balloon pops you need a parachute to get your payload back on the ground in one piece. Parachutes from model rockets seem to be the popular choice. We haven't ordered one yet because we don't know how much our payload is going to weigh.
  • Camera - Obviously we want something digital and we need a way for the camera to take pictures without any user intervention. The easiest thing to do is buy a camera that has an intervalometer feature which allows you to set the camera to take a picture every X seconds. The other option is to rig some sort of mechanical device to push the shutter button every X seconds. Dale has tracked down a free camera for Project-WARPED but it doesn't support invervalometer so we will have to rig a mechanical solution. Here's a great website for some more information on time lapse photography.
  • Tracking - This is the tricky part. If you launch a balloon to 100k feet and take lots of cool pictures you need a way to recover the camera when the balloon finally lands. We will be using Automatic Position Reporting System (APRS) to track the balloon's location. In a nutshell, APRS is implemented by using a GPS receiver that attaches to a RF transmitter which in turn transmits the GPS coordinates via packet radio (this is why we needed our ham radio licenses). We will pick up the RF signal from our transmitter (the Micro-Trak 300) by using a RF scanner on the ground. The headphone output from the RF scanner feeds into a laptop's microphone input which decodes the data from the scanner into a digital format containing the GPS coordinates of the balloon. Doing this last part on the laptop is something we don't have working yet. The following powerpoint presentations have more detail on APRS and how it ties into ballooning:

What's our vector Victor?


The FCC was faster than we expected :) We were added to their online database on Friday, September 21st (6 days after passing the test). Alli's callsign is KI4ZNJ, Dale's is KI4ZNK, and Daniel's is KI4ZNL.

Getting our technician license wasn't too bad. We studied for the test using HamTestOnline and found a testing location in our area via the AARL website (American Radio Relay League). The test is 35 multiple choice questions and you have to get 26 correct to pass. If you decide to take the test be sure to bring $14 cash, a photo ID, a No 2 pencil and a calculator.